Machine vision is successfully applied to many industrial inspection problems, leading to faster, more accurate quality control. In the move towards 100% inspection, machine vision will become increasingly important. Current research is concentrating on producing more robust and versatile systems.
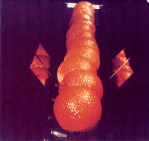
 Oranges, other fruit and vegetables are selected and graded according to
quality. This is a costly and labour intensive task, where consistency
is difficult to maintain. Video image processing techniques can be used
to automate the process, grading over 25,000 oranges per hour. The
oranges are fed on to a roller conveyor. A combination of special
lighting, mirrors and camera control techiques is used to obtain a
complete image of the surface of each fruit. This image is analysed by
localised adaptive thresholding, followed by region analysis to detect
blemish cues, from which actual blemishes are identified. A model-based
stem detector prevents stems from being classified as blemishes. The
results are used, in conjunction with predefined classification
criteria, to grade each fruit inspected.
 Much industrial inspection s limited by the use of dedicated software
which cannot cope sufficiently with the natural variability in the
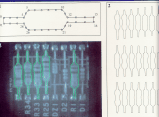
assembly of subcomponents. Research is underway to develop a system that
can be 'taught' what components to identify, and the degree of
variability to expect. Using a training set, points are identified which
will provide sufficient information to create a template (Fig 1). The
mean positions of these points are used to produce a model of mean
shape. The parameters that can cause deviation from this model are
identified and quantified (Fig 2). The system can now use the learnt
flexible template to identify, for example, components on a circuit
board (Fig 3). This principle can be used to produce more robust image
analysis systems and allow software to be up-dated to new designs by the
user.
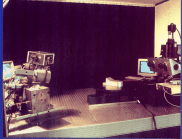
 Inspection of machined parts often requires 3D information. One way to
achieve this is to use laser striping. When a laser stripe is projected
on to an object, it is distorted by the object's shape and features. 3D
information can be obtained by viewing the distortion through a pair of
cameras. Combining the information from a series of stripes produces a
3D model. Segmentation techniques can be used to group together areas
which distort the laser stripe in the same way. This allows the
individual planes and features of the part to be identified. For
example, a feature such as a bore hole will distort the laser stripe
differently from its surrounding surface and can thus be located. If the
data collected is compared to a 3D model, orientation and important
features of the part can be identified. Once located, key features can
be measured in detail.